If you own a Wallingford Craftsman, you know the woodwork, built-ins, and front porch are the heart of your home. The right staging can turn those details into scroll-stopping photos and a seamless 3D tour that drives showings. In this guide, you’ll get a clear, room-by-room plan that protects period character while making every image count. You’ll also learn practical photo and 3D-tour prep that works with Wallingford’s market expectations. Let’s dive in.
Why Wallingford Craftsman photos matter
Buyers searching in Wallingford often respond to original millwork, built-in cabinetry, plate rails, mantels, and multi-pane windows. Many homes date from the early 1900s through the 1920s, so buyers expect character to shine. Your goal is to present authentic details with simplified styling that photographs beautifully.
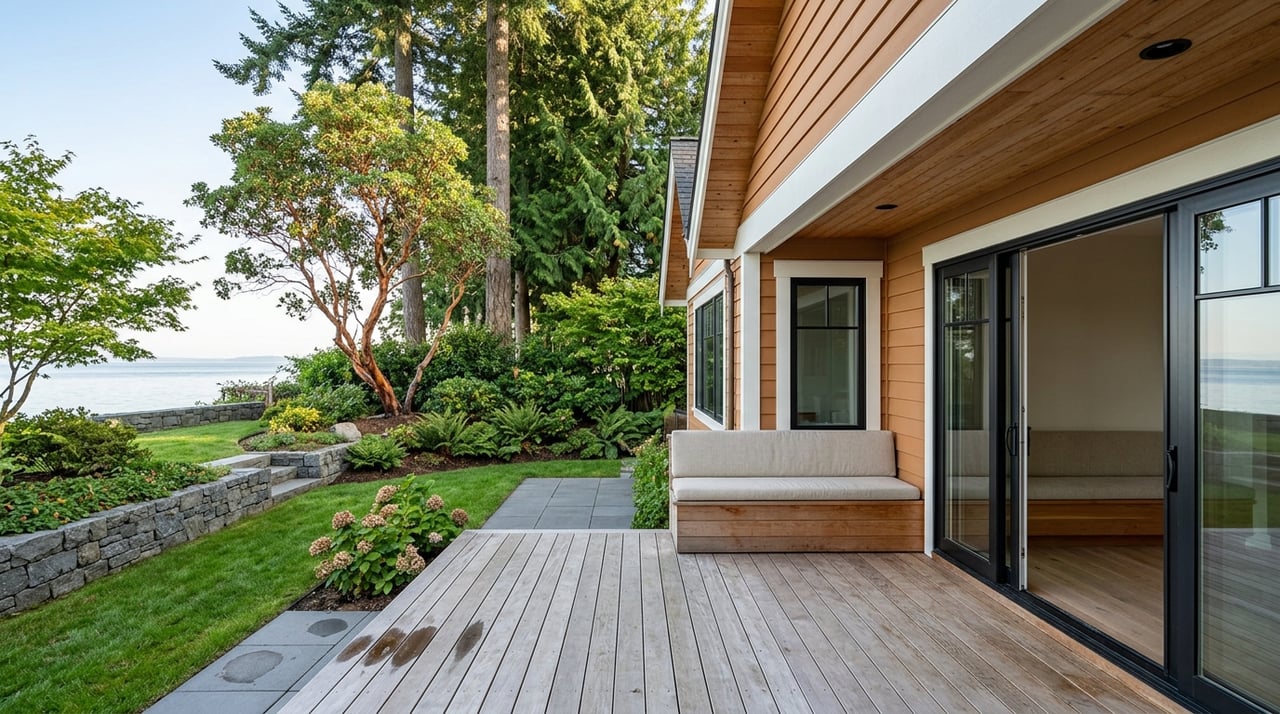
Wallingford’s walkability and proximity to neighborhood amenities also make curb appeal shots valuable. Exterior photos that show a tidy porch, clean trim lines, and inviting entry sightlines tend to perform well.
Craftsman staging basics that photograph well
Overarching goals
- Preserve and highlight original woodwork and built-ins.
- Create open sightlines from entry and primary camera positions toward focal features like the fireplace, window seat, or staircase.
- Balance period authenticity with clean, decluttered styling for broad appeal.
- Keep lighting even so shadows do not hide millwork detail.
Color and trim strategy
- Choose neutral wall colors that contrast gently with wood trim. Warm off-whites, soft greiges, or muted greens and blues complement oak or fir.
- Avoid painting over original trim unless necessary. If trim is already painted or very dark, pair it with the right wall color and lighting to prevent a cave-like feel.
- For small refreshes, consider stain touch-ups or a clear coat instead of a full repaint on original woodwork.
Furniture scale and layout
- Use furniture that fits Craftsman proportions. Oversized sectionals can crowd bay windows and built-ins.
- Keep paths clear with 30 to 36 inches of walk space on main routes.
- Let built-ins breathe. Curate bookcases with a mix of books and objects, plus negative space to keep the look clean in photos.
Art and accessories
- Above the mantel, aim for art about two-thirds the mantel width. Gallery groupings should match that visual mass.
- Above a sofa, art should be roughly two-thirds to three-quarters of the sofa width.
- Hang art so the center is around 57 to 60 inches from the floor. Adjust for ceiling height and trim.
- Choose simple ceramics, woven textiles, and brass or patinated metals. Keep groupings minimal so details read clearly in photos.
Lighting
- Use LED bulbs at the same color temperature throughout a room, ideally 2700–3000K for a warm, inviting feel.
- Add floor or table lamps to fill darker corners and reduce deep shadows that hide wood grain.
- If you have stained glass or transoms, plan exposures so the glass reads without blown highlights.
Textiles, rugs, and floors
- Show off hardwood floors. Remove small rugs that visually chop up space or hide wood detail.
- Use a correctly sized area rug in living spaces so at least the front legs of major furniture sit on it. This creates scale and visual depth.
Declutter, depersonalize, and anchor
- Remove personal photos and most collectibles. Keep a few curated pieces to suggest lifestyle without cluttering built-ins.
- Give each room one clear visual anchor, such as a styled dining table, simple mantel, or well-made bed.
Room-by-room plan: what to do now
Entry and front porch
- Sweep and refresh the front door with paint or stain that suits the period.
- Add two matching planters with simple greenery. Include a porch bench or single chair if space allows.
- Clear away personal items and use a small, period-appropriate rug inside.
Photography priority: Capture a wide shot from just inside the door that shows flow into the living area and one focal detail like a staircase, fireplace, or built-in.
Living room or parlor
- Arrange seating in conversational zones that keep a clear view to the fireplace and built-ins.
- Style built-ins with curated books and objects while leaving negative space.
- Keep window treatments minimal. Sheers or bare trim will showcase woodwork and windows.
- Layer lighting with overhead and table lamps for even, warm illumination.
Photography tips: Include a wide shot that captures trim and natural light plus a close frame on mantel or built-in detail. Watch reflections in glass-front cabinets.
Dining room
- Highlight plate rails or built-in hutches. Keep the table scaled to the space.
- Style the table with a single centerpiece. If space is tight, keep place settings subtle and minimal.
- Use a chandelier or pendant with bulbs turned on and matched to the rest of the room’s color temperature.
Photography priority: A table-centered wide shot and a detail image of built-ins or plate rails.
Kitchen
- Clear counters of small appliances. Leave one or two attractive items like a fruit bowl or cutting board.
- Clean and polish hardware and cabinet surfaces. Tidy grout.
- If cabinets are original and dark, add task lighting or lamps to balance exposure.
- Remove magnets and papers from the fridge.
Photography tips: Shoot from a corner to show layout and flow to adjacent rooms. Capture detail shots of original hardware or restored cabinetry.
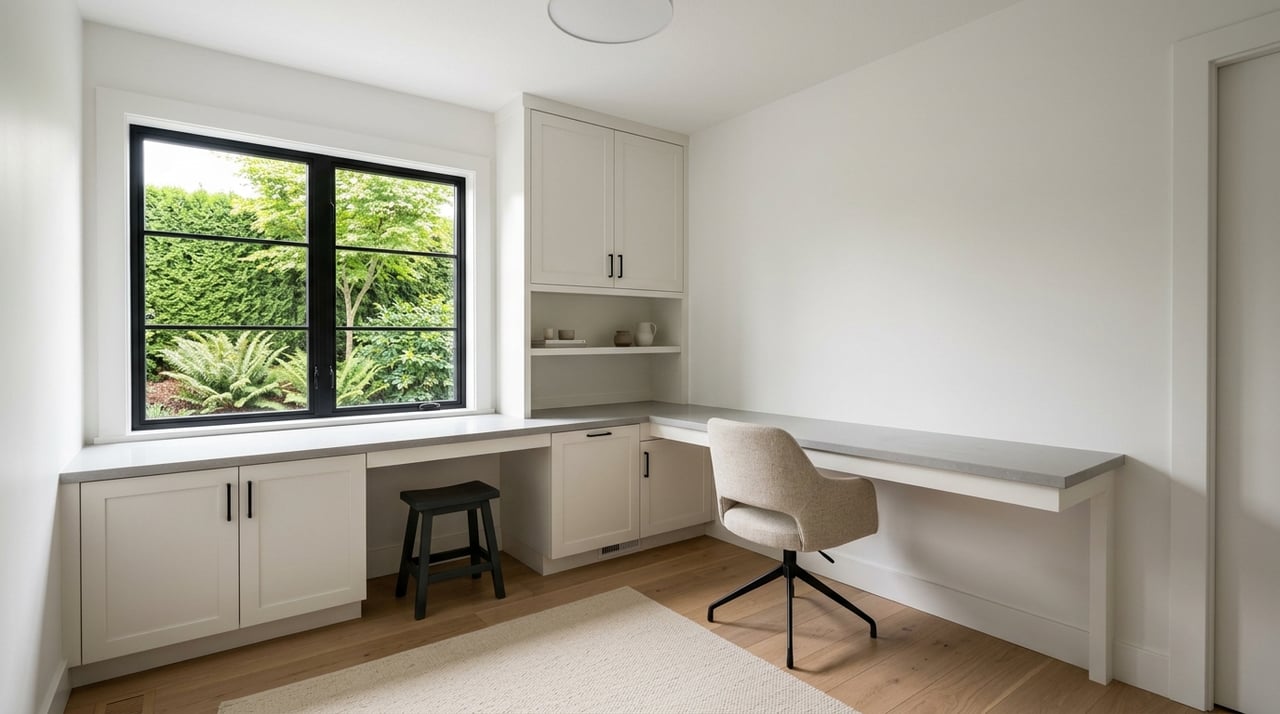
Bedrooms
- Make the bed the anchor with neutral bedding, two pillows, and a single throw.
- Keep nightstands simple: one lamp and a small book or plant.
- If the room is small, remove extra furniture and leave one chair or stool.
Photography tips: Choose an angle that shows the room without distortion and includes windows or built-in features.
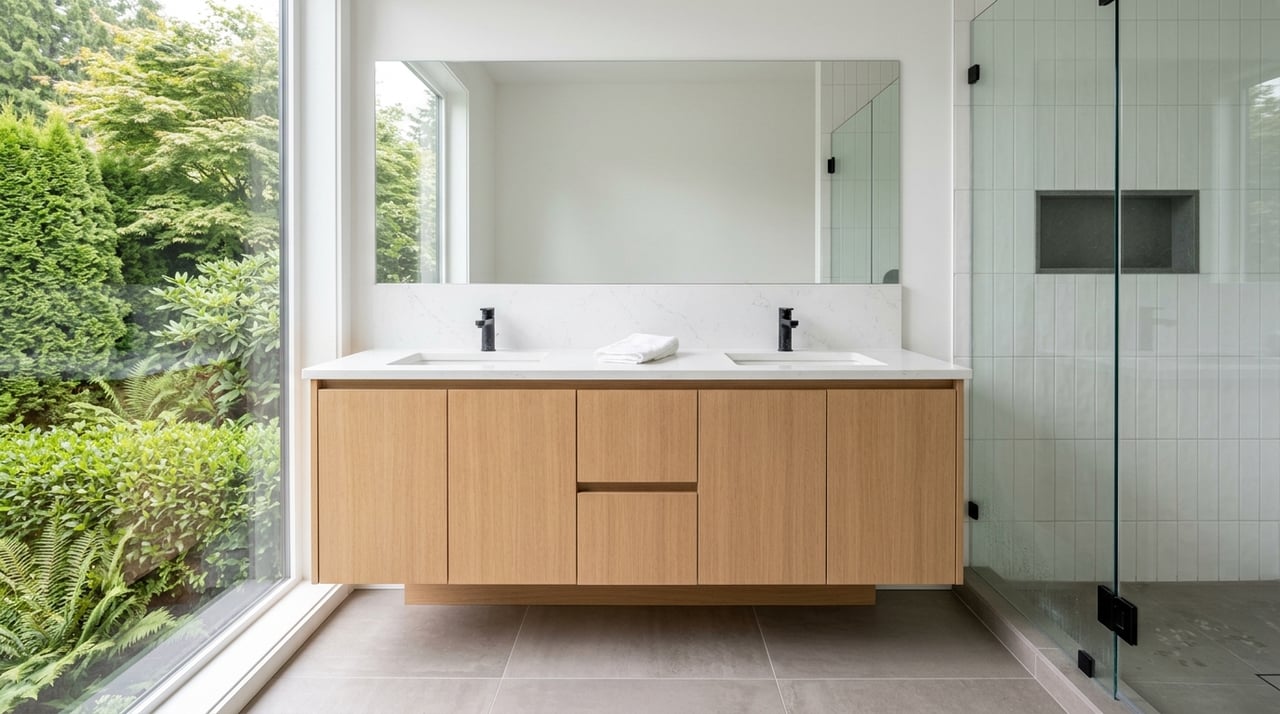
Bathrooms
Deep clean and clear counters. Use a neutral shower curtain or none if you have glass.
Replace dated hardware only if it is cost effective. Otherwise, keep it tidy.
Add one folded towel and a small plant or soap dish for a polished look.
Photography tips: Use a tripod and keep verticals straight to show tile height and period fixtures.
Built-ins, nooks, staircases, and mantels
- Keep shelves 50 to 70 percent full. Mix books with decor and leave empty space.
- Style the fireplace simply with two candlesticks and centered art. Clean the hearth.
- Clear the staircase and light it so the newel post and balusters stand out.
Photography tips: Capture detail shots that celebrate craftsmanship plus a contextual wide shot that shows how the built-in fits the room.
Exterior and landscaping
- Trim vegetation that hides windows or trims. Clean gutters and touch up porch paint.
- Remove cars from the driveway during the shoot. Adjust angles to highlight the porch and hint at neighborhood context.
- Keep porch lights on and walkways clean for both daytime and twilight shots.
Photography tips: Aim for early morning or late afternoon for softer light. Avoid harsh midday shadows.
Photography and 3D-tour prep
Hire the right team
For top-tier presentation, hire a real estate photographer experienced with older homes and mixed light. If you plan a 3D tour, choose a provider who understands historic interiors and how to capture built-ins without ghosting.
Pre-shoot checklist
- Turn on all interior and exterior lights. Match bulb color temps where possible and replace any that are out.
- Open window coverings or use sheers to control glare. Clean glass.
- Remove small personal items, tuck cords, and hide trash and bins.
- Secure pets and remove pet items.
Camera and capture notes
- Use a tripod and keep horizons level. Avoid ultra-wide settings that warp trim.
- Use bracketing or HDR to balance bright windows with interior details.
- For most interiors, shoot at eye level between 5 and 5.5 feet. Add one slightly lower or higher angle for key features like the fireplace.
- Avoid direct flash that flattens wood grain. Use continuous lamps or off-camera light if needed.
3D-tour prep
- Remove small movable items that can confuse scans, such as lightweight rugs or extra decor.
- Keep lighting consistent across rooms to reduce stitching differences.
- Open doors between rooms to improve navigation and reduce dead ends.
- If you use virtual staging, disclose it. Accurate representation matters for historic homes.
Image delivery and file priorities
- Use wide shots as hero images and include 8 to 12 interior images of primary rooms.
- Add detail shots of trim and built-ins.
- Deliver high-resolution files suitable for MLS and 3D-tour thumbnails.
Safety, permits, and preservation
If your home predates 1978, follow federal lead-based paint rules. Use lead-safe work practices for any renovation or paint disturbance and handle disclosures appropriately. For any repair or electrical upgrade that affects lighting or permanent materials, confirm permit requirements with the City of Seattle or King County. If your home may be in a historic district or have landmark status, review guidance with the City of Seattle Department of Neighborhoods before making permanent changes.
When in doubt, consult preservation-minded contractors and certified lead-safe renovators. Focus on reversible updates that protect the home’s original fabric while improving how it photographs.
Quick checklist you can print
- Clean and declutter every room. Remove personal photos and most collectibles.
- Turn on all lights and match bulb color temperatures.
- Open window coverings and clean windows inside and out.
- Style built-ins lightly with books, 3 to 5 objects, and open space.
- Center and scale art: mantel about two-thirds width, sofa art two-thirds to three-quarters.
- Keep 30 to 36 inches clear for major walk paths.
- Remove cars from the driveway. Tidy the porch and walkway.
- Pull small rugs that bunch or hide hardwoods. Use a correctly sized area rug where needed.
- Verify any needed permits and lead-safe practices before altering historic materials.
- Confirm deliverables and file formats with your photographer and 3D provider.
Ready to present your Wallingford Craftsman at its best? Let us coordinate staging, professional photography, and a 3D tour that highlights every detail. Contact Michelle Codd Homes to start your room-by-room plan and get market-ready with less stress.
FAQs
Should I paint original trim before listing a Wallingford Craftsman?
- In most cases, preserve original trim. If trim is damaged or already painted, choose tasteful updates that keep character and consult a preservation-minded contractor.
How much furniture should I keep for photos in a small Craftsman?
- Aim for minimalism with one clear anchor per room. Remove pieces that block flow and maintain 30 to 36 inches of walk space on main paths.
Do buyers expect modern kitchens and baths in Craftsman homes?
- Many buyers value original character. Present updates that complement the historic fabric rather than fully modernizing unless systems are failing.
Is virtual staging a good idea for historic Craftsman listings?
- Use virtual staging with care and disclose it. Many buyers prefer accurate representation of trim, built-ins, and materials.
What should I do about potential lead paint before repainting?
- For homes built before 1978, follow federal lead-based paint rules and hire a certified lead-safe renovator for any work that disturbs paint.